Setting up security cameras at home is a smart way to enhance safety and monitor your property. In recent years, technological advancements have made it easier than ever to install a reliable system. Whether you’re looking to prevent break-ins, monitor pets, or keep an eye on your home remotely, this guide will walk you through the entire installation process. From selecting the best cameras to ensuring proper security, you’ll be ready to protect your home with ease.
1. Plan Your Camera Placement
Start by walking around your home. Identify vulnerable areas, like doors, windows, and entryways. Next, consider blind spots, such as hallways and garages, for camera placement. Additionally, place cameras where they’re hard to tamper with, yet offer a clear view. Finally, make sure there’s enough space for proper camera angles.
2. Choose the Right Camera System
Choose between wired and wireless cameras. Wired cameras are stable but require drilling and running cables. On the other hand, wireless cameras are easier to install but may need battery recharges. Additionally, check the camera features. Outdoor cameras need weather resistance, night vision, and motion detection. For indoor cameras, look for smaller models with two-way audio and home automation features.
3. Gather Your Tools and Materials
You’ll need the following tools and materials:
- Drill and drill bits
- Screwdrivers
- Measuring tape
- Level
- Mounting brackets
- Ethernet cables (for wired systems)
- Power supply cables
- Screws and anchors
- Smartphone or tablet
- Power strips or outlets
Once everything is ready, you can begin the installation.
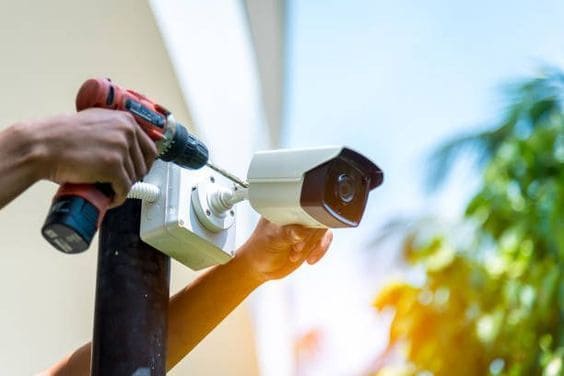
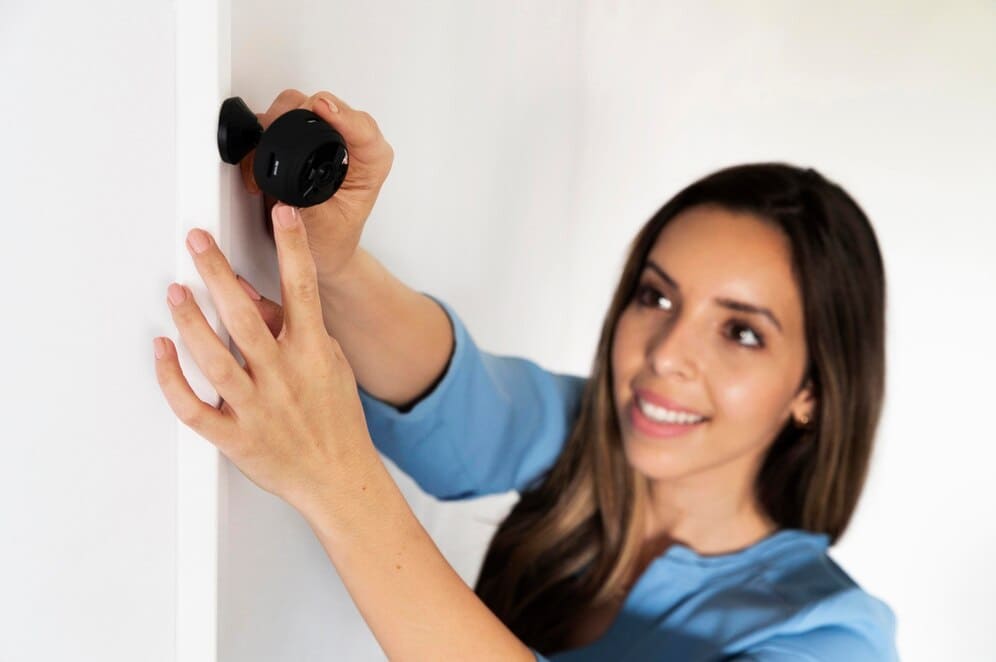
4. Mount the Cameras
Measure where the cameras will go. Then, mark drilling points and use a drill for pilot holes. Afterward, install the mounting brackets with screws or anchors. Next, attach the camera to the bracket and check the angle. Finally, adjust it for the best field of view.
5. Wiring the Cameras (For Wired Systems)
For wired systems, run power cables to an outlet. Next, connect Ethernet cables for video transmission. Ensure the cables are securely attached to both the cameras and DVR/NVR. Afterward, run the cables along walls and secure them. Finally, plug everything in and check for a stable connection.
6. Connecting the Cameras to Power (For Wireless Systems)
For wireless cameras, determine the power source (battery or adapter). Next, place the camera in the desired spot. Ensure there’s a strong Wi-Fi signal in the area. Once powered on, connect the camera to Wi-Fi using the provided app. Finally, check if the camera works through the app.
7. Configure the Cameras and Test the System
Connect each camera to your home network. Then, access the settings through the app and configure preferences, such as motion detection and alerts. Next, test the motion sensor and check if the camera picks up movement. Finally, verify that footage is being recorded properly.
8. Secure Your Camera System
Change the default passwords to something strong. Then, enable two-factor authentication (2FA) for extra security. Additionally, protect your Wi-Fi network with encryption. Finally, regularly update the firmware to ensure the latest security patches.
9. Perform Final Checks and Maintenance
Check that each camera has a clear view. Then, ensure the video quality is good, and the sensors are working. Next, test remote access to view cameras from your smartphone. Finally, schedule maintenance to clean cameras and replace or recharge batteries if needed.
Final Thoughts
Installing cameras at home enhances security. By following these steps, you’ll have a reliable system that’s easy to maintain. Whether you choose wired or wireless, proper placement and configuration are key.